
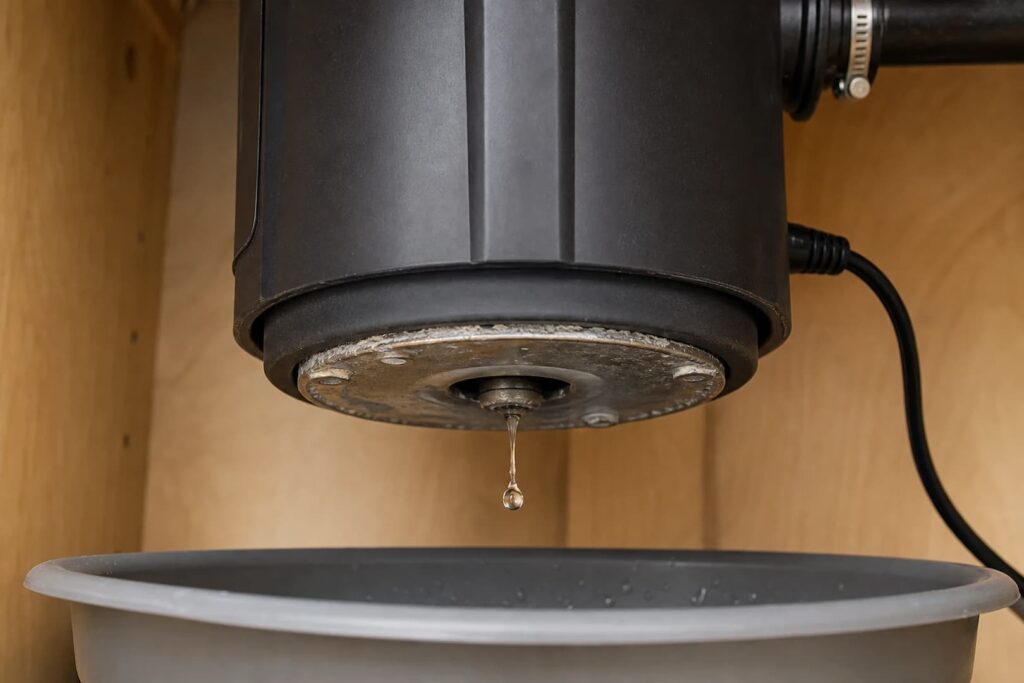
If a garbage disposal is truly leaking from the bottom of its housing, replacement is usually more practical than repair. Water reaching the bottom often means an internal seal, bearing area, or corrosion point has failed inside a unit that is not designed for field rebuilding.
First make sure the water actually starts at the bottom. A leak at the sink flange, dishwasher hose, discharge elbow, or P-trap can run down the disposal body and drip from its lowest point. That looks like a bottom leak from the cabinet floor even though the repair may be an external gasket, clamp, putty seal, or drain connection.
Stop using the sink and disposal until the source is identified. Disconnect electrical power without touching wet plugs, outlets, or switches. Place a shallow pan under the unit, empty the cabinet, and dry the visible surfaces. Do not smear caulk or epoxy over the bottom plate. Sealing an exit hole can trap water around the motor or redirect it toward electrical components.
The first wet point distinguishes a true internal leak from water traveling down the housing. It also separates repairable connections from a unit whose age or corrosion favors replacement. Smart Plumbing USA provides garbage disposal repair and installation in Vista, CA.
What a leak from the bottom usually means
A disposal has a grinding chamber above an electric motor. Internal seals keep sink water out of the motor and lower housing. Over time, corrosion, worn bearings, heat, vibration, and repeated jams can compromise those seals or the surrounding metal. Water then travels through the unit and exits around the bottom plate, center opening, reset-button area, electrical cover, or housing seam.
That failure is different from a loose pipe. Tightening an external connection cannot restore an internal seal. Residential disposals are commonly replaced as assemblies because opening the motor housing, finding model-specific parts, rebuilding the unit, and testing electrical safety can cost more than installing a suitable replacement.
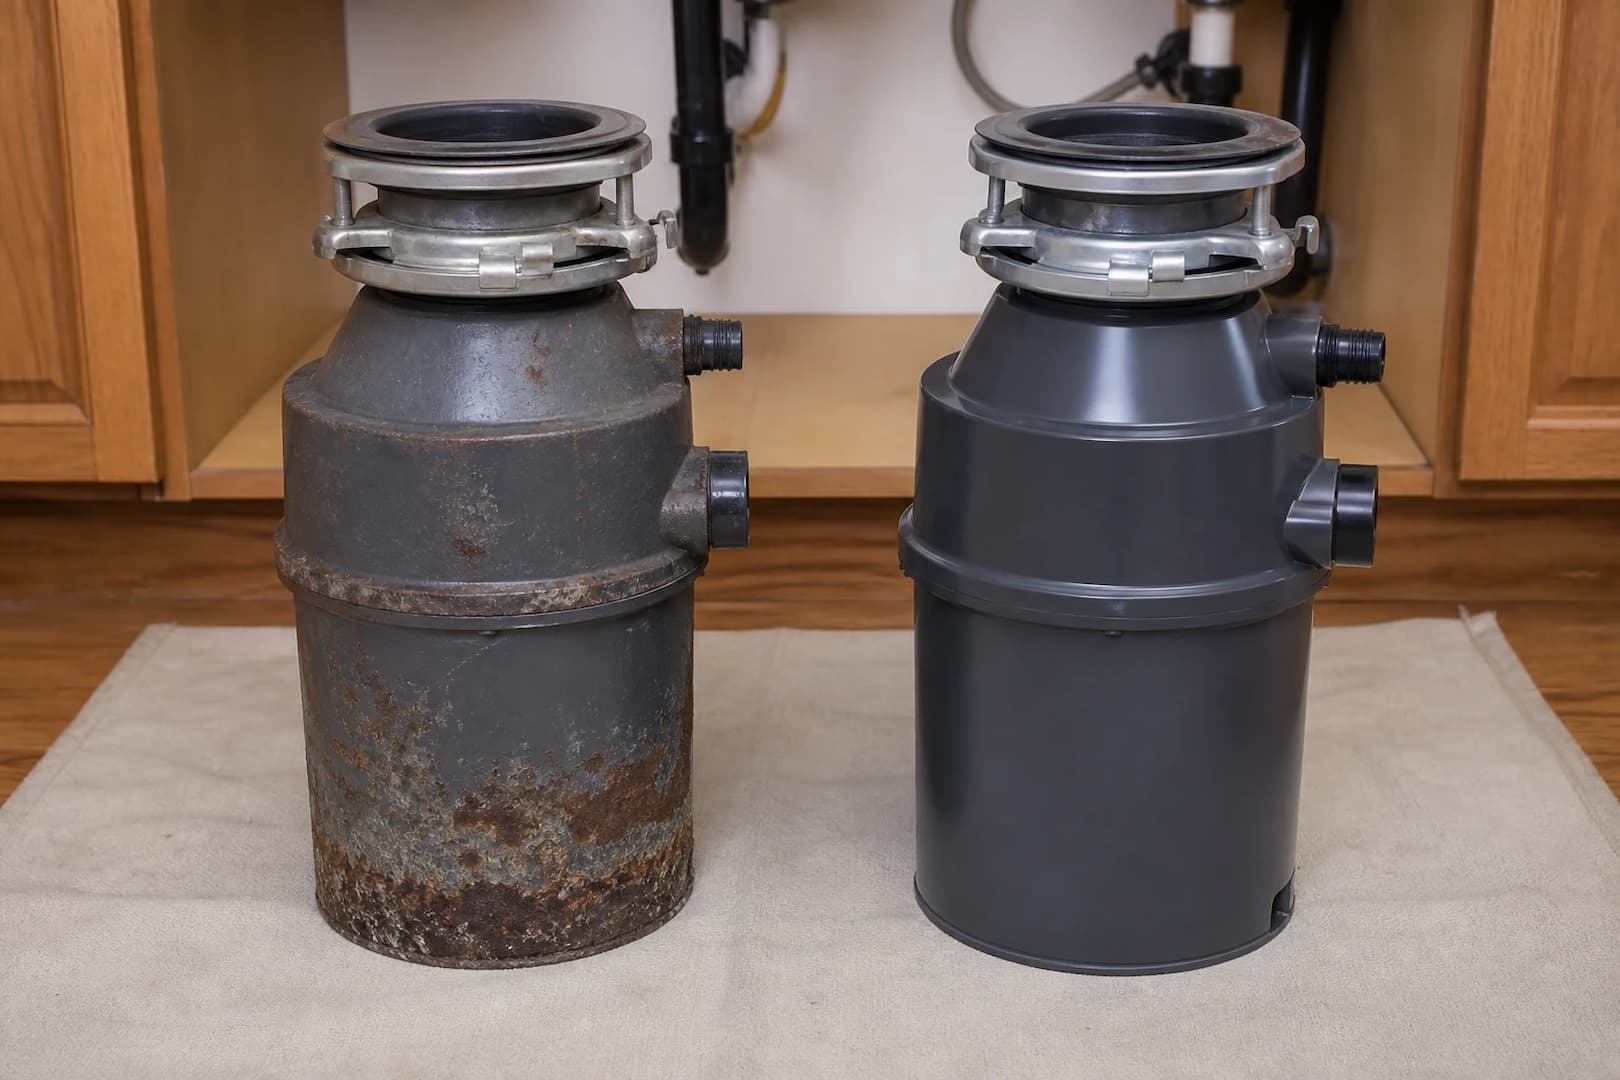
A true bottom leak often comes with other age clues: rust along the lower seam, a rough or noisy motor, frequent reset trips, recurring jams, a musty cabinet, or moisture that returns whenever the sink holds water. None of those signs alone proves internal failure, but the cluster is persuasive.
Safety steps before checking the leak
- Turn off the disposal and stop using the sink. Do not run water to test while the unit remains energized.
- Disconnect power safely. Unplug the unit only if the plug and your hands are dry. Otherwise switch off the correct breaker and verify the disposal cannot start.
- Never put a hand into the disposal. Leak tracing does not require touching the grinding chamber.
- Remove cabinet contents. Cleaning supplies, paper products, and stored appliances hide moisture and can be damaged.
- Use a shallow catch pan. Avoid a tall bucket that presses against the disposal or drain piping.
- Dry the cabinet and unit exterior. A dry starting point makes the first wet location easier to find.
- Stop if water reached electrical components. Have the electrical condition checked before power is restored.
Do not rely on the wall switch as the only disconnect. Switches can be mislabeled, shared, or faulty. A hardwired disposal requires breaker isolation and may be better left to a professional if you cannot verify it safely.
Trace the water from the highest point down
Gravity makes leak diagnosis deceptive. Water from the sink flange can cling to the disposal neck, travel down a molded rib, and drip from the bottom edge. Start at the highest connection and move downward instead of staring only at the final drip.
- Sink flange and mounting ring: the joint where the disposal attaches to the sink opening.
- Dishwasher hose connection: the small hose attached high on the disposal body, if a dishwasher is connected.
- Discharge elbow or outlet flange: the larger pipe that carries ground waste from the disposal.
- P-trap and slip joints: connections downstream of the disposal that can spray or wick back toward it.
- Body seam and bottom plate: the area that indicates internal failure when every connection above remains dry.
Use a bright flashlight and touch dry paper towel to each external joint while the unit is off. Do not wrap material around the motor or leave paper near wiring. If you perform a controlled water test, keep power disconnected and have another person add a small amount of water from above while you watch from a dry position. Stop at the first sign of leakage.
Leak at the sink flange: usually repairable
If water starts around the sink opening or mounting assembly, the seal between the sink flange and basin may have failed. Old plumber’s putty can dry, a mounting ring can loosen, or movement in the disposal and pipes can disturb the joint. Water then runs around the outside of the unit.
A proper repair normally requires supporting and removing the disposal, releasing the mounting assembly, cleaning the sink opening and flange, resealing with the material appropriate for the sink and manufacturer instructions, then reinstalling and testing. Adding caulk from below without cleaning the joint is not the same repair. It may hide the leak briefly while water continues into the cabinet.
Stone, composite, stainless steel, and other sink materials may call for different sealants or precautions. The disposal is heavy and can strain the discharge piping if allowed to hang during service. Support it before loosening the mount.
Leak at the dishwasher hose: usually repairable
The dishwasher hose attaches to a barbed inlet with a clamp. A loose clamp, hardened hose end, split corrugation, or poor alignment can leak only when the dishwasher drains. That timing separates it from a flange leak, which may appear whenever the sink holds water.
With both appliances safely disconnected from power, inspect the hose for a clean fit over the barb and a properly positioned clamp. Do not overtighten a clamp until it cuts the hose. A brittle or split hose should be replaced, not wrapped in tape. Preserve the required air gap or high-loop routing so sink water cannot return to the dishwasher.
If the hose was recently connected to a new disposal, confirm that the dishwasher-inlet knockout plug was removed. A retained plug blocks discharge; it does not usually create a bottom leak, but pressure and a loose hose connection can produce a side leak during the pump cycle.
Leak at the discharge elbow or P-trap: usually repairable
The disposal outlet commonly uses a flange, gasket, and two screws to hold a discharge elbow. A worn gasket, loose screws, cracked elbow, or misalignment can release water when the sink drains or the disposal runs. Downstream slip-joint washers can leak for similar reasons.
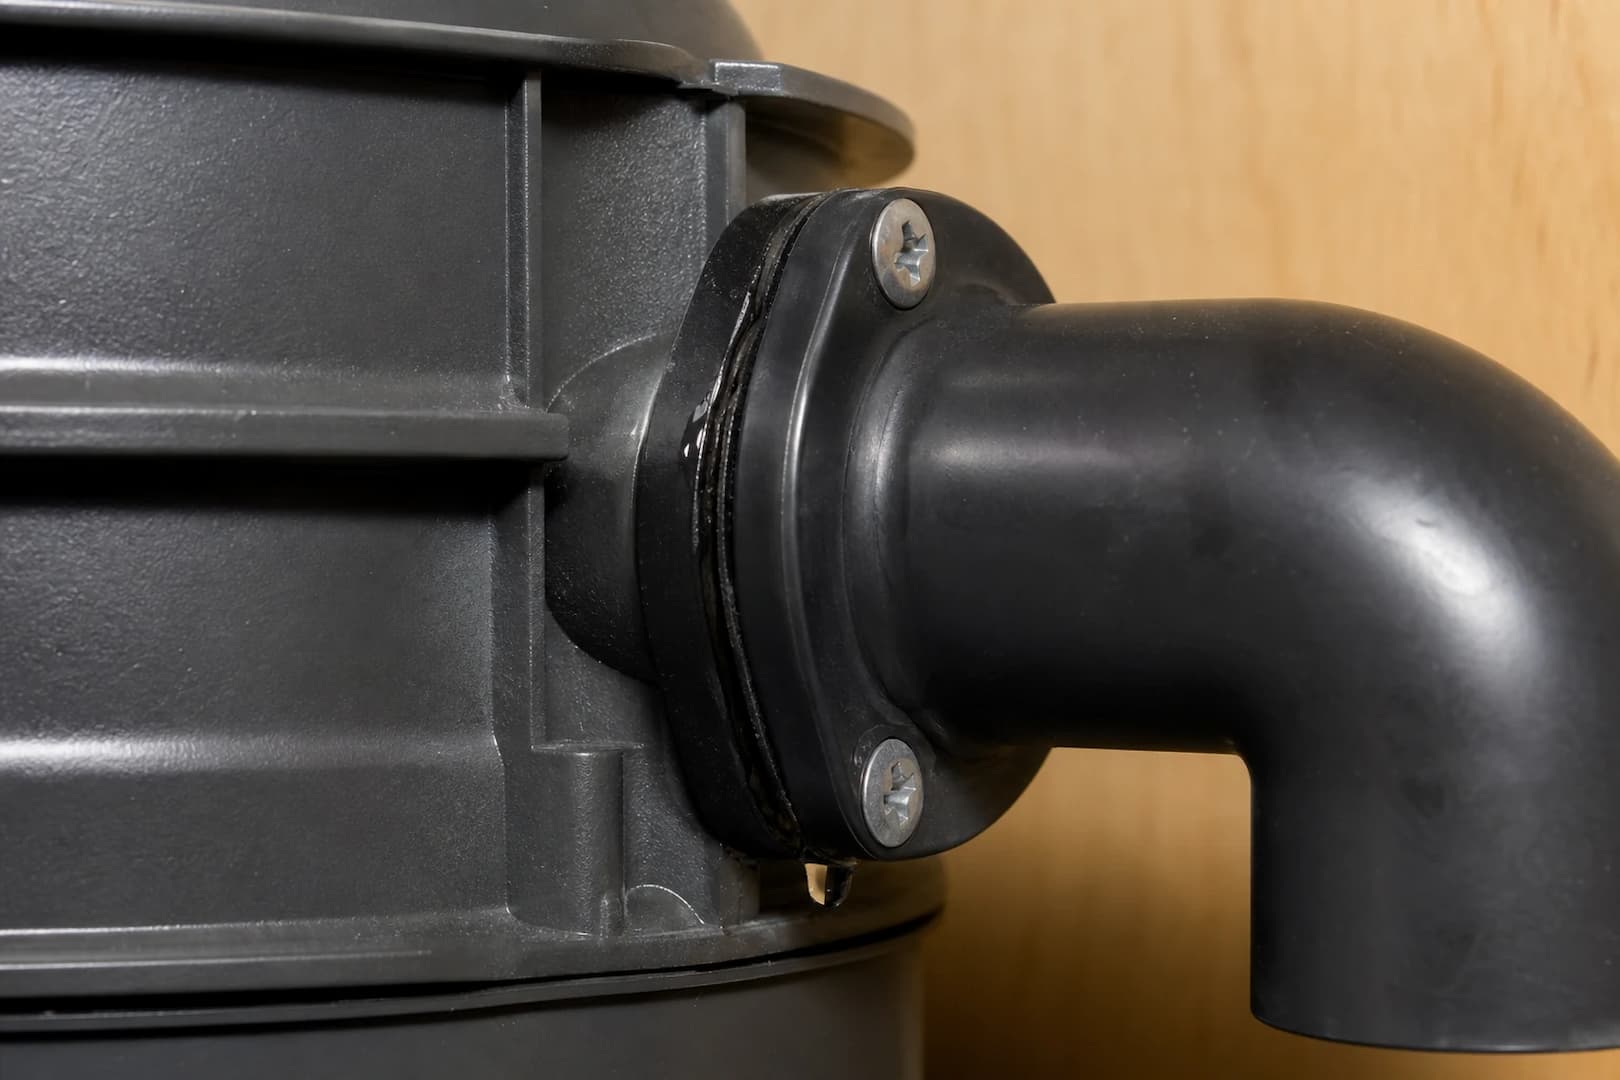
Tightening may help if the fasteners are simply loose and the parts are aligned, but cranking one side down can distort the gasket. Replace a flattened gasket or cracked fitting. The P-trap should meet the disposal outlet without being forced upward or sideways; stressed piping tends to leak again and can transfer movement to the mounting assembly.
A drain clog can contribute to these leaks. Water standing in the outlet and trap puts more time and pressure against marginal joints. If the sink drains slowly or backs up, repair the connection and address the kitchen drain restriction.
A true bottom leak: why replacement usually wins
After the top and side connections stay dry, water emerging from the bottom plate, center opening, electrical cover, reset area, or lower body seam is internal. The seal between the wet grinding chamber and the motor area has likely failed, or corrosion has opened a path through the housing.
Do not operate the unit again. The presence of water in or near the motor changes the problem from an inconvenient drip to an electrical concern. Pressing the reset button does not fix a seal. Neither does tightening the bottom screws, which may hold a cover rather than the water seal.
Some industrial or specialty equipment can be rebuilt, but common residential disposals are not normally repaired internally in the field. Labor, parts availability, corrosion elsewhere, and the difficulty of validating the rebuilt unit make full replacement the safer and more economical route in most homes.
Repair or replace? A practical decision guide
| Finding | Typical decision | Reason |
|---|---|---|
| Leak begins at sink flange | Repair or reseal | The disposal body may still be sound |
| Dishwasher hose or clamp leaks | Repair connection or replace hose | Fault is external and accessible |
| Discharge elbow gasket leaks | Replace gasket or fitting | External joint is serviceable |
| P-trap or slip joint leaks | Realign or repair drain assembly | The disposal may not be at fault |
| Water exits bottom housing while upper joints stay dry | Replace disposal | Internal seal or housing has failed |
| Unit leaks and also hums, trips, grinds, or is heavily corroded | Replace disposal | Multiple systems are deteriorating |
| Relatively new unit with confirmed warranty coverage | Check warranty path | Manufacturer may cover the assembly, though labor terms vary |
Age matters, but condition matters more. An older unit with a loose external gasket can still justify repair. A newer unit with water coming through the motor housing should not be kept alive merely because its calendar age seems low. Look at the actual failure, warranty, corrosion, noise, jam history, and condition of the surrounding plumbing.
What not to do with a leaking disposal
- Do not keep running it to locate the drip. A static water test with power off is safer.
- Do not touch a wet plug, receptacle, switch, or exposed connection. Isolate the breaker when electrical parts may be wet.
- Do not put your hand into the grinding chamber. This rule does not change because the unit is leaking.
- Do not coat the bottom with caulk, epoxy, or tape. These materials can conceal water and interfere with drainage, cooling, or service.
- Do not overtighten mounting or drain hardware. Distorted gaskets and cracked plastic create new leaks.
- Do not leave a bucket as a permanent solution. A missed overflow can swell the cabinet and create odor or mold.
- Do not pour chemical drain cleaner through the disposal. It can damage components and expose anyone who disconnects the piping.
Choosing a replacement disposal
A replacement must fit the sink opening, mounting system, cabinet space, drain height, electrical supply, and dishwasher connection. Matching the old horsepower is a starting point, not the only decision. Household size, how the unit is used, sound preference, septic considerations, and available space also matter.
Check the vertical relationship between the new disposal outlet and the wall drain. A taller unit can place the outlet too low for a proper gravity connection. The P-trap should not be installed backward, doubled, or forced uphill to make a mismatched unit fit. If drain height is marginal, measure before purchase.
If a dishwasher is connected, the inlet plug in the new disposal must be removed and retrieved before the hose is attached. The hose needs a sound clamp and the required air-gap or high-loop arrangement. The electrical connection must match the unit and installation: cord-connected or hardwired as applicable, grounded, protected, and kept clear of leaks.
Replacement is also a good time to inspect the sink flange, mounting ring, discharge elbow, P-trap, wall arm, shutoff valves, supply lines, cabinet floor, and under-sink outlet. Installing a new motor below a clogged branch or stressed drain assembly invites another service call.
What a professional installation should include
The installer supports and removes the old unit without using the drain piping as a hanger, cleans and evaluates the sink flange, and checks whether the existing mounting components are compatible and sound. The new disposal is secured evenly, with enough clearance for the outlet and future service.
Drain parts are aligned without strain. The dishwasher inlet is prepared when needed, and the hose routing is preserved. Electrical connections stay dry and mechanically secure. After installation, the unit is tested first for static leaks, then under sink flow, dishwasher discharge, and disposal operation. The cabinet should remain dry through every part of that sequence.
A useful final check looks beyond the disposal. If the sink drains slowly, the new unit should not be blamed for a branch clog that was already present. Clearing the line and testing full flow protect the new seals and connections from avoidable standing water.
How to prevent disposal leaks and early failure
Feed small amounts of suitable food waste with cold water. Keep grease, large bones, shells, fruit pits, fibrous peels, coffee grounds, rice, pasta, and non-food items out. The disposal may grind some of these, but the branch drain still has to carry the result.
Stop the unit if it jams, hums, vibrates unusually, or changes sound. Repeated stalls create heat and stress. Never use the disposal as a way to force standing water through a clogged pipe. Address slow drainage so the outlet and gasket are not left submerged after normal use.
Open the cabinet occasionally and look with a flashlight after running the sink and dishwasher. A faint water track, swollen cabinet base, rust mark, or sour odor can reveal a leak before the bucket-worthy drip begins. Store supplies so they do not press against hoses, cords, or the disposal body.
Frequently Asked Questions
A true bottom-housing leak usually indicates internal seal or housing failure, so replacement is normally more practical. First confirm that water is not running down from the sink flange, hose, or discharge joint.
Water near the reset button or bottom electrical cover often means an internal seal has failed and water has entered the lower housing. Disconnect power and replace the unit rather than pressing reset.
Yes. Water can travel down the disposal body and drip from its lowest edge. Dry the unit, then inspect from the sink flange downward to find the first point that becomes wet.
No. Coating the bottom does not restore the failed internal seal and may trap water near the motor or redirect it toward electrical parts. A true internal leak calls for replacement.
No. Stop using the sink and disposal until the source is corrected. Water near the motor, cord, outlet, or switch creates an electrical concern, and continued leakage can damage the cabinet.
Inspect the dishwasher hose, clamp, disposal inlet, and downstream drain. A hose connection leak is often repairable and may run down the housing, while a clogged path can increase pressure at the joint.
Not automatically. A sound unit with a worn gasket may justify repair. Replacement becomes more attractive when the unit is also corroded, noisy, repeatedly jammed, tripping, or near the end of its reliable service life.
Call when the leak source is unclear, water reached electrical parts, the sink flange or drain assembly needs removal, piping is corroded or misaligned, the branch drain is clogged, or the disposal needs replacement.
Final thoughts
A drip that falls from the bottom of a garbage disposal does not always begin there. Dry the assembly and trace from the sink flange through the dishwasher connection, discharge elbow, and P-trap. Those external leaks are often repairable.
When every upper connection remains dry and water exits the lower housing, disconnect power and plan on replacement. Internal water and an electric motor are not a combination to monitor with a bucket. A correctly sized new unit, aligned drain piping, sound dishwasher connection, and full leak test provide the durable fix.